_Cover")
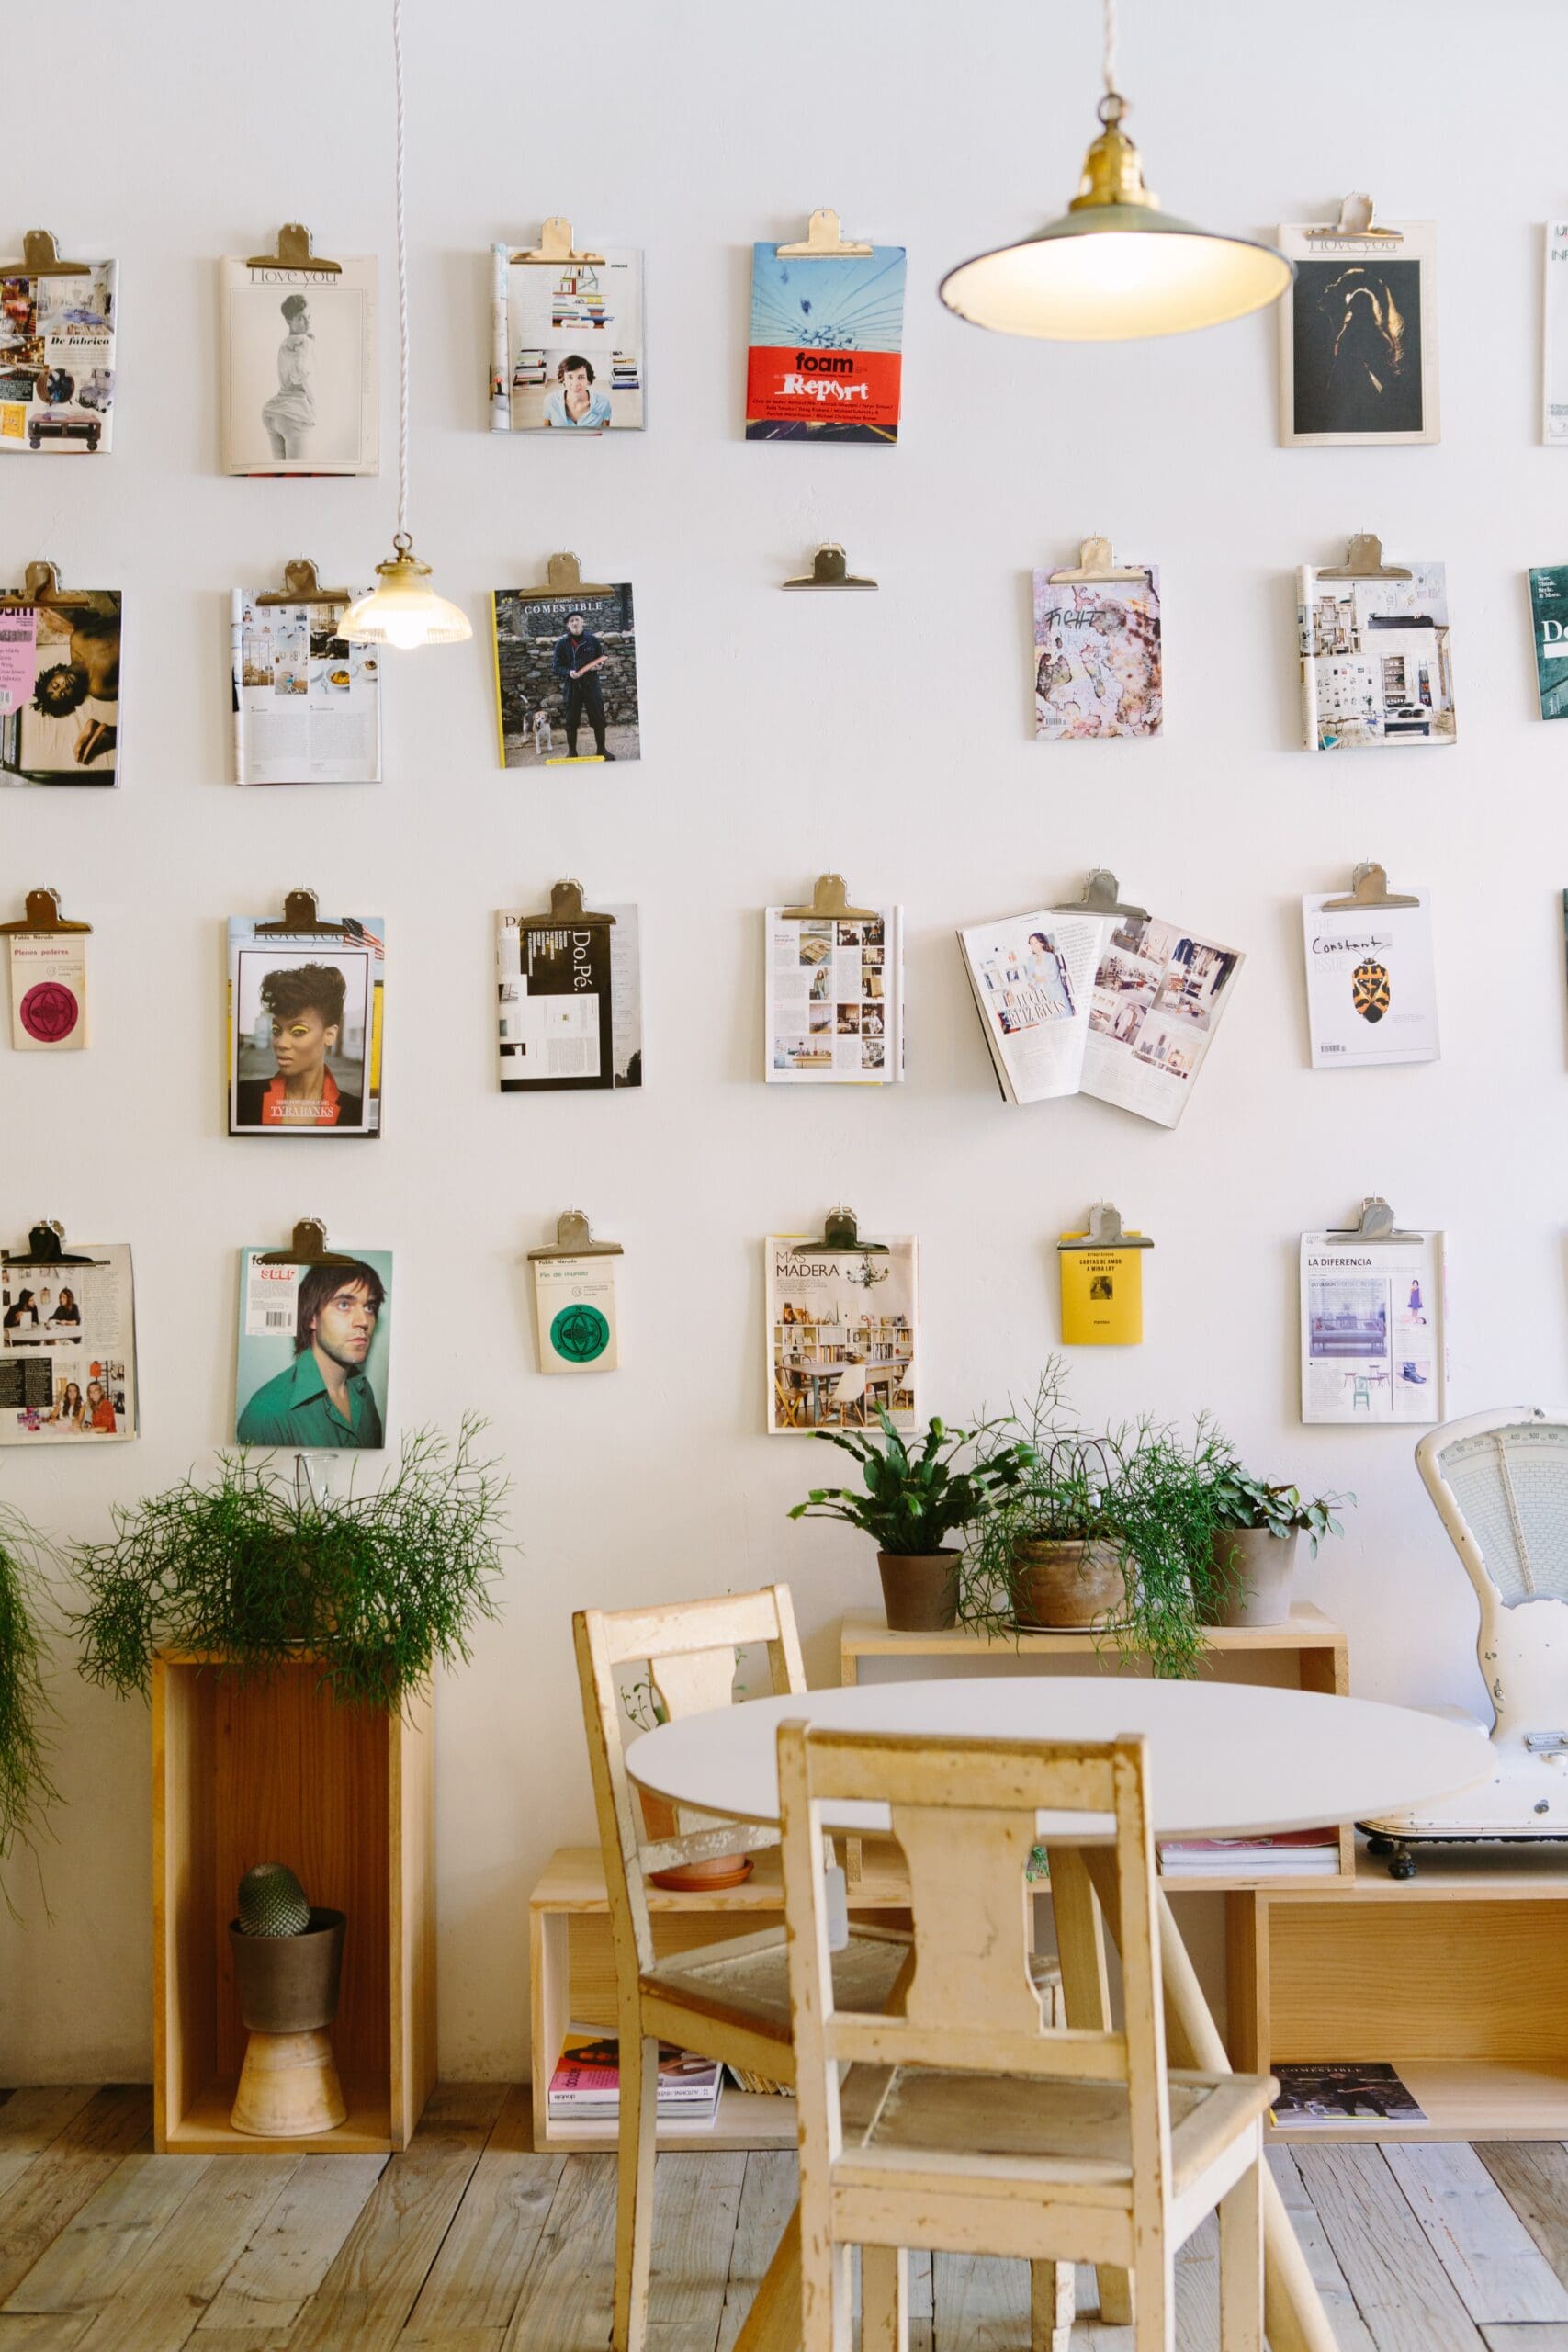
Creating a DIY clipboard wall art installation is a fun and creative way to display various artworks, prints, or photographs in your home. Here’s a step-by-step guide on how to do it:
Materials needed:
- Clipboards (quantity depends on the desired size of your installation)
- Wall hooks or adhesive strips
- Artworks, prints, or photographs
- Scissors
- Optional: Paint, washi tape, or other decorative materials for customizing the clipboards
Step 1: Choose the Location Decide on the wall where you want to install your clipboard art display. Consider a space that allows for easy viewing and complements the overall aesthetic of your room.
Step 2: Prepare the Clipboards If desired, you can customize the clipboards to match your style. Paint them in a color of your choice, add patterns with washi tape, or apply other decorative materials. Allow them to dry completely before moving on to the next step.
Step 3: Determine the Layout Plan the layout of your clipboard display by arranging them on the floor or a large table. Experiment with different configurations until you find a visually appealing arrangement that fits the available wall space.
Step 4: Attach the Clipboards Once you’re happy with the layout, it’s time to attach the clipboards to the wall. Use wall hooks or adhesive strips that are suitable for the weight of the clipboards. Follow the manufacturer’s instructions for proper installation. Place the hooks or strips evenly along the top edge of each clipboard.
Step 5: Add Artworks, Prints, or Photographs Now it’s time to add your chosen artworks, prints, or photographs to the clipboards. Trim them to fit the size of the clipboard if necessary. Open the clip on each clipboard, place the artwork inside, and close the clip to secure it in place. Repeat this step for each clipboard, filling them with your desired pieces.
Step 6: Arrange and Adjust Step back and assess the overall look of your clipboard wall art installation. Adjust the clipboards as needed to ensure they are straight and evenly spaced. Take the time to fine-tune the arrangement until you’re satisfied with the display.
Step 7: Enjoy and Update Your DIY clipboard wall art installation is now complete! Step back and admire your curated display. The great thing about this installation is that it allows for easy swapping and updating of artworks. Feel free to change or rotate the pieces whenever you want to refresh the display.
Remember to take care when removing and reattaching the clipboards to prevent damage to your walls. Enjoy the creative freedom and versatility of your new clipboard art display! —Vita Daily
Be the first to comment